Magic Of The Right Forearm / Elbow Action
Quote:
Are the Frozen Right Wrist and the Locked Left Wrist Hitting procedures? That would definitely be the traditional view. Hitting is all about Muscle Power, Thrust and Structure, and the terms 'Frozen' and 'Locked' -- while jarringly hard -- seem right at home in that environment. At the same time, they are at odds with the "soft hands" and "flexible wrists" widely viewed as the Swinger's birthright. So much so, in fact, that to suggest otherwise is revolutionary (if not heretical). But then Homer Kelley was that kind of guy. As discussed in my previous post, the term 'Locked' -- Webster: "rendered immovable" -- was slated for Homer's 7th edition. It denotes only that the Left Wrist -- other than in the Standard Adjusted Address (10-9-A) -- is 'Locked' into its Flat condition, i.e., it cannot produce any Horizontal Motion (Bending or Arching). Instead, it can produce only Perpendicular Motions (Wrist Cocking and Uncocking) and Rotational Motions (Turning and Rolling). To that extent, the Left Wrist may be considered 'Unlocked.' This 'Left Wrist Locked (in its Flat condition)' may be a tough concept for Swingers to handle, but to the extent they deviate from that precision alignment, quoting Homer, "They will pay a price." The word 'frozen' is no doubt even more controversial. What could be 'tighter' or 'harder' or more the antithesis of the lyrical Swinging Motion than something that is 'frozen?' So much so, that Homer himself had a hard time applying the term to Swingers early on. But as he came to a full understanding of the importance of the Flying Wedge Alignments and Structure (6-B-3-0-1), his view changed -- I have this discussion on tape -- and he came to believe that the Frozen Right Wrist serves Swingers equally well as Hitters. From the Third Edition's 10-18-0 'General' Section (applying to both Hitters and Swingers): "...the Right Wrist, if it moves at all, moves in accord with the Left Wrist. Ideally, it should be frozen in its Impact Fix Position -- preferably from the Top of the Stroke to well into, or through, the Follow-Through." [Bold by Yoda.] The term 'frozen' -- Webster: "rendered immobile" -- denotes that the Right Wrist is 'locked' -- that word again -- in its Level and Bent condition. In other words, it cannot produce any Perpendicular Motion or any Horizontal Motion (other than its Impact Fix Degree of Bend). Instead, it can produce only Rotational Motions (Turn and Roll). To the extent the Right Wrist deviates from that Frozen condition, the Clubface will be misaligned at Impact. The bottom line is that, as usual, Homer said exactly what he meant in terms that were unmistakably clear. Through Impact, your Left Wrist must be Flat, Level and Vertical, and your Right Wrist must be Bent, Level and Vertical. The best way to achieve this Ideal Impact Alignment is to permit during the Stroke only Left Wrist Perpendicular and Rotational Motions and Right Wrist Rotational Motions. And the way you do that is to Lock your Left Wrist in its Flat Condition and Freeze your Right Wrist into its Bent and Level condition early in the Stroke and then maintain those conditions until the end of the Follow-Through. Interestingly, I have thus far not mentioned Grip Pressure. That is because, within limits, Gripping ‘light’ or ‘tight’ is the player’s option. What matters is that the essential Wrist Conditions be maintained throughout the Stroke. And that requires a highly developed kinesthetic sense of Wrist Alignments, not necessarily a tight Grip. That said, the Hands are best viewed as strong, Educated Clamps attaching the Club to the Arms. Per 1-L #3, there should be “no wobble in the Clubshaft attachment.” The player with Uneducated Hands might do well with a lighter Grip Pressure because he may then be less likely to ‘horse’ the Club out of the correct alignments that Centrifugal Force is trying its best to produce. The skilled player, on the other hand, can use the tighter Grip Pressure to give his Educated Hands a more complete control of the Club throughout the Stroke. The Tight Grip is especially effective as resistance against the terrific forces of Impact Deceleration. Remember, per Isaac Newton’s Third Law (2-C-0), the Ball hits the Club just as hard as the Club hits the Ball. Said another way, and summing up this entire discussion… Impact is a place for Science, not “Seems as ifs.” |
Magic Of The Right Forearm / Elbow Action GM#4
Quote:
Tball, For the record, while I didn't present an exhaustive analysis, three of the last four paragraphs of my prior post addressed Grip Pressure. :oops::oops: Regarding your specific question, please answer the following questions: 1. Where is this slippage of the Club occurring -- Left Hand or Right Hand or both? 2. When is it occurring, e.g. at the Top? Release? Impact? 2. What Basic Grip are you using, e.g., 10-1-A (Overlap) or 10-1-D (Interlock)? 3. What Grip Type are you using, e.g. 10-2-B (Strong Single Action), 10-2-D (Strong Double Action), or one of the other five Types. 4. What is your current perceived Grip Pressure, light or tight? Does that pressure change markedly during the Stroke? 5. What is your current skill level, i.e., single-digit handicap, double-digit but below 18, or dreaded 'other.' Topic:Tom Tomasello |
Magic Of The Right Forearm / Elbow Action GM#7
Quote:
The Hands in their correct alignments absolutely operate as a precisely coordinated unit. Only by doing so are they able to maintain the alignments and structure of the Flying Wedges Assembly (6-B-3-0-1). For lighter Grip Pressures, your 'gauze' analogy is effective as far as it goes. I would suggest first wrapping the Right Hand, Wrist and Forearm separately -- better yet, put it in a cast (my personal Feel) -- to preclude any vertical or horizontal motions. It is also important that the 'gauze' not prevent the Left Wrist's Vertical Cocking and Uncocking Motions. Finally, to help a student find his own ideal Grip Pressure, I would suggest the student experiment with even tighter 'wraps.' |
Magic Of The Right Forearm / Elbow Action GM#9
Quote:
1. It is not only possible to maintain a Bent and Level Right Wrist while Cocking and Uncocking the Flat Left Wrist, it is mandatory. Study the Flying Wedges (6-B-3-0-1). 2. Maintaining the Right Wrist Bend guarantees a Flat Left Wrist, but only if the Right Wrist Bend is precisely the amount established at Impact Fix. If the Bend is less, the Left Wrist will be Bent. If more, it will be Arched. Be aware that the further Forward the Ball is positioned, the greater the amount of Right Wrist Bend. And the further back, the lesser the amount. 3. After the Follow-Through, the Flat Left Wrist Swivels back against the Plane and then Bends as the Right Wrist Flattens (Right Palm down to the face of the Plane). This is the reverse of their positions in the Backstroke. At the Finish, most really good players have restored the original Flying Wedge alignments, i.e., the Flat Left Wrist and the Bent Right Wrist and their perpendicular relationship to each other. Topic:Clubhead Lag Quote:
|
Magic of the Right Forearm/Elbow Action GM#29
Quote:
JG33, For all Strokes, the entire Flying Wedge Assembly -- Left Arm and Right -- remains intact at least through the end of the Follow-Through (the Both Arms Straight position). |
Magic Of The Right Forearm / Elbow Action GM#34
Quote:
Yes, I remember an article Ken did on the short game years ago where he put both wrists and forearms in casts. In addition to preventing any Left Wrist Bend, the Left Wrist/Forearm cast precluded the Wristcock. This would be another helpful image because you would rarely use the Wristcock -- the Velocity Accumulator (6-B-2) -- in a Single Barrel (10-4-A) Stroke. Incidentally, I have previously commented on the mistaken notion that maintaining the 'Locked' and 'Frozen' alignments requires a tight Grip Pressure. It is helpful to realize that the 'cast' that 'freezes' the Right Wrist in its Bent and Level Impact Fix alignment does not prevent the Wrist within that cast from remaining in an inert, unstressed condition from the Top through Impact per 4-D-1. In other words, the cast is one thing and the degree of tension in the Wrist is quite another. |
Magic Of The Right Forearm / Elbow Action GM#35
Quote:
Yes. Regardless of the Hinge Action employed, Clubhead Force and Motion is always On Plane at right angles to the Sweetspot (1-L #10 and #11) and also to the Clubshaft (7-11). At the Top, Hitters Drive Load (10-19-A) the Clubhead Lag Pressure with the No. 3 Pressure Point at right angles to the Aft side of the Shaft and that Loading is maintained through Impact. Swingers, on the other hand, Drag Load (10-19-C) the Lag Pressure at right angles to the Top of the Shaft. That Loading is maintained at least into Release, at which time the Swivel may or may not cause it to return to the Aft side of the Shaft (10-11-0-3). If it does not, the Swinger who began with a Strong Single Action Grip (10-2-B) has now changed to a Weak Single Action (10-2-A). |
Magic Of The Right Forearm / Elbow Action GM#71
Quote:
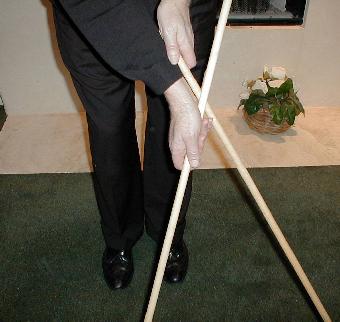
Vince, Ideally, the player establishes a Turned Shoulder Plane (10-6-B) at Impact Fix and positions the Right Forearm and Clubshaft on this Plane. Study this Right Forearm alignment in the pictures 9-2-2 #2 and 9-2-10 #2. Regarding the Right Wrist 'Release'...it has none. The Wrist Release is an Uncocking of the Left Wrist (2-P). Even though it is executed on an Inclined Plane, the Wristcock remains a Vertical motion (4-B-0/1/2/3) and it defines the plane of the Left Arm Flying Wedge (6-B-3-0-1). Any Flattening of the Right Wrist is a Horizontal Motion (4-A-0/1/2/3) that destroys the alignments of both the Right Arm and Left Arm Flying Wedges. The pictures below should help clarify things. Thanks to Golfingrandy for the photos and to Martee for his help on getting these up!  The Left Arm and Right Forearm Flying Wedges (Zero #3 Accumulator) 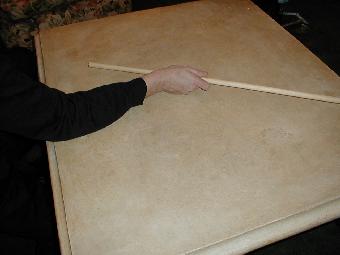 The Right Forearm Flying Wedge -- On Plane Forearm and Clubshaft 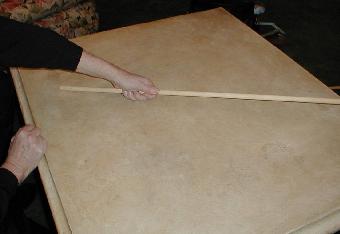 The Left Arm Flying Wedge -- Off Plane Forearm (with #3 Accumulator) and On Plane Clubshaft 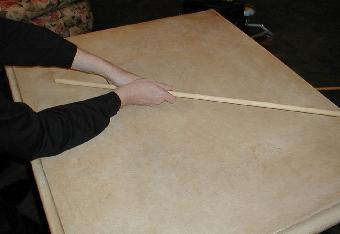 The Flying Wedges Assembly 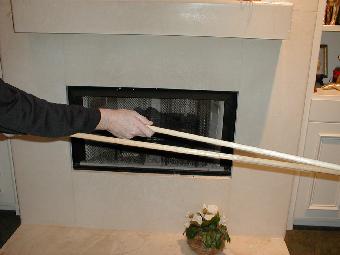 The On Plane Right Forearm Flying Wedge on a Horizontal Plane 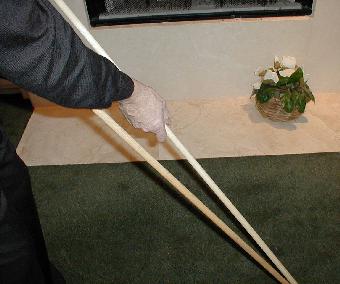 The Right Forearm Flying Arm Wedge lowered to an Inclined Plane |
GM#71 Contiinued
 The Impact Alignment and Angle of Approach of the Right Forearm Wedge 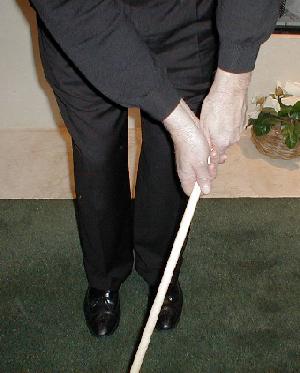 Impact Alignment of the Flying Wedges Assembly 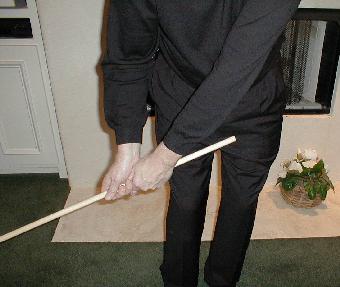 Flying Wedges Assembly in Start Up 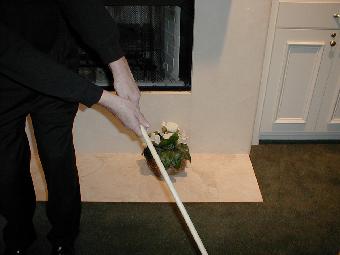 Flying Wedges Assembly at Follow-Through (Both Arms Straight) |
Magic Of The Right Forearm / Elbow Action GM#82
Quote:
Yes to both questions, Stan. However, the purpose of the photos was to illustrate the Flying Wedges Alignments -- Left Arm, Right Forearm and their collective Assembly -- not the Clubface Hinge Action or the Clubhead Physics of Rotation. |
Magic Of The Right Forearm / Elbow Action GM#84
Quote:
Swingers align the Right Forearm directly behind and in support of the On Plane Loading Action of the Clubshaft. Hitters support the Loading of the entire Primary Lever Assembly, i.e., the Left Arm and Club. The difference in their respective Loading Actions is most evident at The Top. In Start Up, however -- assuming no Wristcock -- the Right Elbow Alignment is the same for both Hitting and Swinging: at Right Angles to the Clubshaft. The term Right Elbow Alignment is preferable to Right Elbow Position. Its actual Position would be different if the Hitter's Angle of Approach Procedure, but its Alignment would be identical |
Magic Of The Right Forearm / Elbow Action GM#85
Quote:
The Plane of the Right Forearm Flying Wedge (6-B-3-0-1) and the Plane of the Clubshaft (2-F and 1-L #5) are not one and the same. They define the same Plane only when the Right Elbow is On Plane, i.e., during Start Up and through Release and Impact. In the precision assembly of the Right Forearm Flying Wedge, the Right Wrist is Frozen in its Bent, Level and Vertical Alignments. Throughout the Stroke, the Wrist may make Rotational Motions (Turn and Roll), but it does not make Vertical Motions (Cock and Uncock) and once Bent in its Impact Alignment, it makes no further Horizontal Motions (Bend or Arch). The Skilled Player uses his Right Forearm and #3 Pressure Point to Trace the Straight Plane Line and thereby maintain a consistent Clubhead Orbit (2-N-0). He has learned to disregard both the Clubhead and the Body. Instead, he relies solely on his Educated Hands (5-0) to control the Three Functions of the Club (Face, Head, and Shaft per 1-L) throughout the Three Station Stroke (12-3). |
Magic of the Right Forearm / Elbow Action GM#127
Quote:
Swingweights, overall Clubweight and other 'balancing' factors make little difference to TGM players. That is because your normal #3 Pressure Point Pressure moves lighter Clubs faster and heavier Clubs slower (6-C-2-0). This produces a higher 'Approach Speed' (into Impact) for the lighter Clubs. However, the heavier Clubs have more mass. These two factors -- higher velocity versus more mass -- tend to cancel each other out, and this results in a nearly identical Separation Speed for both the lighter and heavier Clubs. But this brings us to an important point: No matter what Club you are using, you must Sustain the Lag all the way through Impact. Impact is, as Homer used to say, "so terribly violent!" And the idea is to make that violent collision last as long as possible -- you want that Ball to stay on that Clubface for as long as possible -- so as to transfer as much of the Clubhead Momentum to the Ball as possible. And remember: The Ball hits the Clubface just as hard as the Clubface hits the Ball! That means that the Clubhead will slow down during Impact. Since the Ball picks up 100 percent of the Separation Speed (of the Clubhead), your job is to make sure that the inevitable Clubhead Slowdown is as little as possible. All this means that you Never Quit at Impact! Finally, though you do 'hit the Ball with your #3 Pressure Point,' it is best to visualize a much more 'massive' action. The #3 Pressure Point is the 'Point' that is Driving your entire Right Forearm Flying Wedge -- the Right Forearm, Frozen Bent Right Wrist, #3 Pressure Point and the angled extension of the Club. Think of all this as one unit, and keep Driving it -- Follow-Through! -- all the way through to Both Arms Straight! It is the 'Open Sesame' to a lifetime of Better Golf. |
Magic of the Right Forearm / Elbow Action GM#131
Quote:
By 'angled extension of the Club,' I mean that the Club is an Angled Extension of the Right Forearm. And by 'more massive' I mean that it is not only the #3 Pressure Point supplying the Driving, On Plane Force required by 1-L-#10, it is also the Right Forearm. And the thrust of the Right Forearm, in turn, is either supported by the On Plane Right Shoulder (Hitters) or supplied by it via the Centrifugal Force created by its Downstroke Turn (Swingers). In other words, you 'hit the ball' not only with your #3 Pressure Point, you hit it with your entire Right Side -- Shoulder, Forearm and #3 Pressure Point (balanced with #1 if you want) -- all On Plane directly behind the Clubshaft and Driving the Clubhead Lag and Sweetspot toward the Plane Line. And when you get it right... It's Delicious. Absolutely delicious. |
Right Forearm Alignments GM#133
Quote:
Study the photos in 9-2-1 #2; 9-2-2 #2; and 9-2-3 #1. See also my posts above regarding the minimal #3 Accumulator and the heel-to-toe positioning of the sole of the club |
Magic of the Right Forearm/Elbow Action GM#135
Quote:
Assuming: 1. A Flat Left Wrist executing any one of the three Hinge Actions; 2. Including their proper Rhythm; 3. With the Clubface aligned at Impact Fix per the selected Hinge Action; 4. The Ball properly positioned for Straightaway Flight; and 5. The Right Forearm and #3 Pressure Point Tracing the Square-Square Plane Line of 10-5-A... The Ball will go dead straight. |
Right Forearm Alignments GM#146
Quote:
Don't even get me 'started' on the Start Down! |
Planes, Pressure Points, Grips, and Lasers - Ugh! GM#160
Quote:
Good stuff. See also the correct Right Forearm Alignment in: 9-2-1#2; 9-2-2 #2; 9-2-3 #1; and 9-2-10 #2. Get your Book, a Club and head for the nearest full-length mirror. Look, Look, LOOK to get it right! First without the Club; then, with the Club. Your Left Wrist is Flat, Level and Vertical; your Right Elbow is Bent; and your Right Forearm is On Plane with the Clubshaft its Angled (from the Bent Right Wrist) In Line Extension. When you do this, you will look like a Player. If you continue to do this on the Practice Tee and Course... You will become a Player. |
Magic Of The Right Forearm / Elbow Action GM#168
Quote:
Homer Kelley liked things that were so absolutely correct that you didn't have to use the term 'degrees' to describe what you were talking about. For example, was your Left Wrist Flat at Impact? Or not? Did you Trace the Straight Plane Line? Or Not? Did you Thrust the #3 Pressure Point down a Straight Line Delivery Path? Or not? Absolutes. Unmistakeable absolutes: -- From the Top, Thrust the Straight Line Lag Pressure Point (Clubhead). -- Trace the Straight Plane Line (Clubshaft). -- Keep your Left Wrist Flat (Clubface). Drive. |
Right Forearm Alignments GM#169
Quote:
Justin, Thanks for writing. My answers are in bold. 1. What are the advantages/disadvantages of going to maximum trigger delay as advocated by Ben Doyle? Very few Shots require Full Power. 2. What are the advantages/disadvantages of setting up with the right forearm and shaft on the same plane angle at address? (I don't see pros do this but it is where they are going to end up at impact isn't it.) The exact Right Forearm On Plane Angle is established in Impact Fix (8-2) with the Weight (Hip) shifted, the Spine Tilted and the Right Shoulder On Plane. The Left Wrist is Flat and the Right Wrist is Bent. For Hitters, these alignments will be maintained at Adjusted Address (8-3). For Swingers, after Fix, the Weight will be returned between The Feet, the Spine will be Vertical and the Right Shoulder will parallel to the Line. The Left Wrist will be Bent and the Right Wrist will be Flat. Nevertheless, every effort should be made to keep the Right Forearm On Plane (and pointing toward the Line). From Homer Kelley: "That's where I get in trouble. When I move back to Adjusted Address, my Forearm gets too high." 3. What are the advantages/disadvantages of using a zero shift swing on the turned shoulder plane angle as shown in the chapter 12 basic stroke patterns? (Again, I don't see any pros do this, but at least in theory, it would seem to make the motion more simple than the more traditional double shift?) |
Magic Of The Right Forearm / Elbow Action GM#184
Quote:
As I wrote on a post earlier today -- or was it yesterday? :oops:-- the Right Forearm On Plane at Impact is due to the Right Shoulder being On Plane. This, in turn, is due to the Hip Shift and Axis Tilt at Start Down. So, the On Plane Right Forearm and the Impact degree of Right Elbow Bend is dependent upon the Impact Location of the Hip and Spine. Any attempt to recreate the On Plane Right Forearm and Fix degree of Right Elbow Bend without the accompanying Hip Shift (and Axis Tilt) tends to create contortive (and even 'un-golflike') alignments at Adjusted Address. So, if you're going to 'tilt' your Axis at Address, do it via the very slight -- but nevertheless required -- Hip Shift, not through an artificial lowering of the Right Shoulder. And when you Shift (and probably slightly Turn) your Hips, leave your Head directly between your Feet. In other words, do not 'lean' to the right or otherwise attempt to get 'behind the Ball.' Head Location is independent of Ball Location. With your Head Centered between your Feet, you're already 'behind' the Ball. Or 'in front' of the Ball. Or 'even with' the Ball. Now stay there and do the really important thing: Keep the Clubhead behind The Hands. It's God's Plan. |
The Right Arm GM#209
Quote:
Welcome Aboard, sdbyrd, Wonderful stuff! You will find that everything in TGM you understand -- and correctly execute -- works. And it will keep working! You will hit plateaus, of course, but only as preparation for your 'next' level. I know this for a fact. I've been at it some 25 years now, and I'm more excited than ever! |
Magic Of The Right Forearm / Elbow Action GM#257
Quote:
For Hitters -- that would be you, JG33! -- the Right Elbow does indeed Cock the Left Wrist as it Bends and Fans in the Backstroke. But remember, the Hitter's Left Wrist Action to The Top is essentially Angled Hinge Action (10-18-C-2). So, while the Right Wrist retains its Bent (Horizontal Grip Motion) and Level (Vertical Wrist Motion) Impact Fix alignments, it continuously Turns (Rotational Hand Motion) from Start Up to The Top. Study 4-0. The Golfing Machine. Gotta love it! :oops: |
Magic Of The Right Forearm / Elbow Action GM#260
Quote:
Good question, Patrick, and Homer specifically addressed it in his additions slated for the as-yet-unpublished 7th Edition: 4-D-1, paragraph 1, last line -- after "(2-K)" insert: "But, remember that there is normally a point where Backstroke Shoulder and Wrist Motions make it difficult or even impossible to keep the Flat Left Wrist vertical to its Plane or the Right Forearm on its Plane without producing a non-golfing and Off Plane Clubshaft position or motion which is intolerable per 2-F and 3-F-6 for thinking players (1-G)." And there -- from The Man himself -- you have it! :oops: |
Magic Of The Right Forearm / Elbow Action BM#81
Quote:
SuperDave, You have agreed to 'no Single Axis' only under the duress of Truth as professed by your 'critics.' Bottom Line: On Plane is On Plane. Off Plane is Off Plane. During the Release Interval, the Right Forearm is On Plane. The Left Arm is not. For the record, these are Facts, not Opinions. As far as Phoenix Weather goes, here are the current conditions: - Wind from the NE (050 degrees) at 7 MPH (6 KT) - Visibility 10 mile(s) - Sky conditions mostly cloudy - Temperature 93.9 F (34.4 C) - Dew Point 50.0 F (10.0 C) - Relative Humidity 22% - Pressure (altimeter) 29.86 in. Hg (1011 hPa) - Pressure tendency 0.01 inches (0.2 hPa) higher than three hours ago And so it goes. |
Chopping Motion BM#94
Quote:
A Three-Dimensional Impact (2-C-0) -- Downward (Attack Angle) and Outward (Plane Angle) and Forward (Approach Angle) -- requires a Three Dimensional Backstroke (2-F), i.e., the Club moves Upward, Backward and Inward -- On Plane -- instantly and simultaneously. This requires a Three Dimensional Right Forearm and Elbow Motion (2-N-0 and 7-3). If the 'describable sensation' of this Precision Mechanic (1-J and 3-B) 'Feels' "Lifting" and "Chopping" (compared with the Prior Total Motion Feel) then that is the Feel to incorporate into your basic procedure (Chapter 14). But be sure to look, LOOK, LOOK and make sure you are getting the Mechanic right. Otherwise, you will be incorporating into your Stroke the Feel of an incorrect Mechanic. The change in one Component will almost always affect its relationship with others. Therefore, one can expect the need to 'tighten tolerances' within the Total Motion to be the natural byproduct of continuing progress. Here, a continuing relationship with a competent Authorized Instructor can make the transition from 'Can't' to 'Can' as painless and seamless as possible. Even so, at the end of the day, the Instructor can only inform and explain... It is the Student who must absorb and apply. |
Magic of the Right Forearm BM#114
Quote:
The Magic of the Right Forearm (7-3) does not end with the Right Forearm Takeaway. Unlike the disruptive Shoulder Turn Takeaway -- which keeps the Clubhead too 'low' and thus necessitates a Single Shift (10-7-B) to achieve a Turned Shoulder Plane -- the Right Forearm Pick Up takes the Club instantly and simultaneously Up, In and Back with Zero Shift (10-7-A) on a Turned Shoulder Plane (10-6-B). This Three Dimensional Start Up (2-F) parallels the Three Dimensional Impact -- Downward (Attack Angle), Outward (Plane Angle) and Forward (Approach Angle) [2-C-0] -- that is so necessary for Maximum Compression. This geometrically correct Start Up is the best way to assure that you arrive at the Top with minimal adjustment required with regards to the Plane Line, Lag Loading and Right Forearm Position (12-3 / Section 6 / #19-#23). Then, you have only to return the Right Forearm precisely to its own Angle of Approach (7-3) as established at Impact Fix (8-8 ). This assures the Downward element so often missing from the Impacts of even the best players. It thereby eliminates the Clubface 'Wobble' (and Lost Compression) that occurs during Impacts where the Clubhead comes in too low and Laying Back. "As it goes back, so it tends to come down." The Magic of the Right Forearm -- in both directions -- is the open door to your Best Golf. |
Magic of the Right Forearm BM#115
Quote:
Quote:
Quote:
...... Then, you have only to return the Right Forearm precisely to its own Angle of Approach (7-3) as established at Impact Fix (8-8). .............. The Magic of the Right Forearm -- in both directions -- is the open door to your Best Golf. Question...on the backswing your right forearm delivers the club on plane to the top of swing position....What or how do you deliver the right forearm on the forward swing when using a swinger's action (not a hitter's action)? Does the pulling by the left side deliver the right forearm?, the pivot (I hope not, I dont get how the pivot delivers the arms and club), or the right forearm itself? If its the right forearm, it would not seem like a swinger's action. Thanks For a given Delivery Line, the Geometry of the Right Forearm Motion is identical for both Hitters and Swingers. Only the Physics differs (Preface and 2-M-1). The Hitter's Active Right Forearm is Driven into its Impact Fix alignment by Muscular Thrust per 6-B-1-A (Right Triceps Drive). The Swinger's Passive Right Forearm is Thrown into its Impact alignment by Centrifugal Force per 6-B-4-A (Right Shoulder Turn Thrust). |
| All times are GMT -4. The time now is 05:09 AM. |